Styles
Legito Styles help ensure that your clause (paragraph) formatting preferences are consistent throughout and among all of your Legito documents. Using Styles that are aligned with the standard styles found in Microsoft Word and Google Docs, Legito Styles, it is possible to define lists of Styles that can be applied to all of your Workspace documents.
Customers with advanced formatting needs for Word or PDF documents should use Advanced Layout Design in addition to Styles.
Before using Styles, you will first need to create a set list of Styles to use with your Workspace Documents. Once created, it is easy to select the desired Styles to apply to Clauses in Template Editor.
Creating and configuring styles
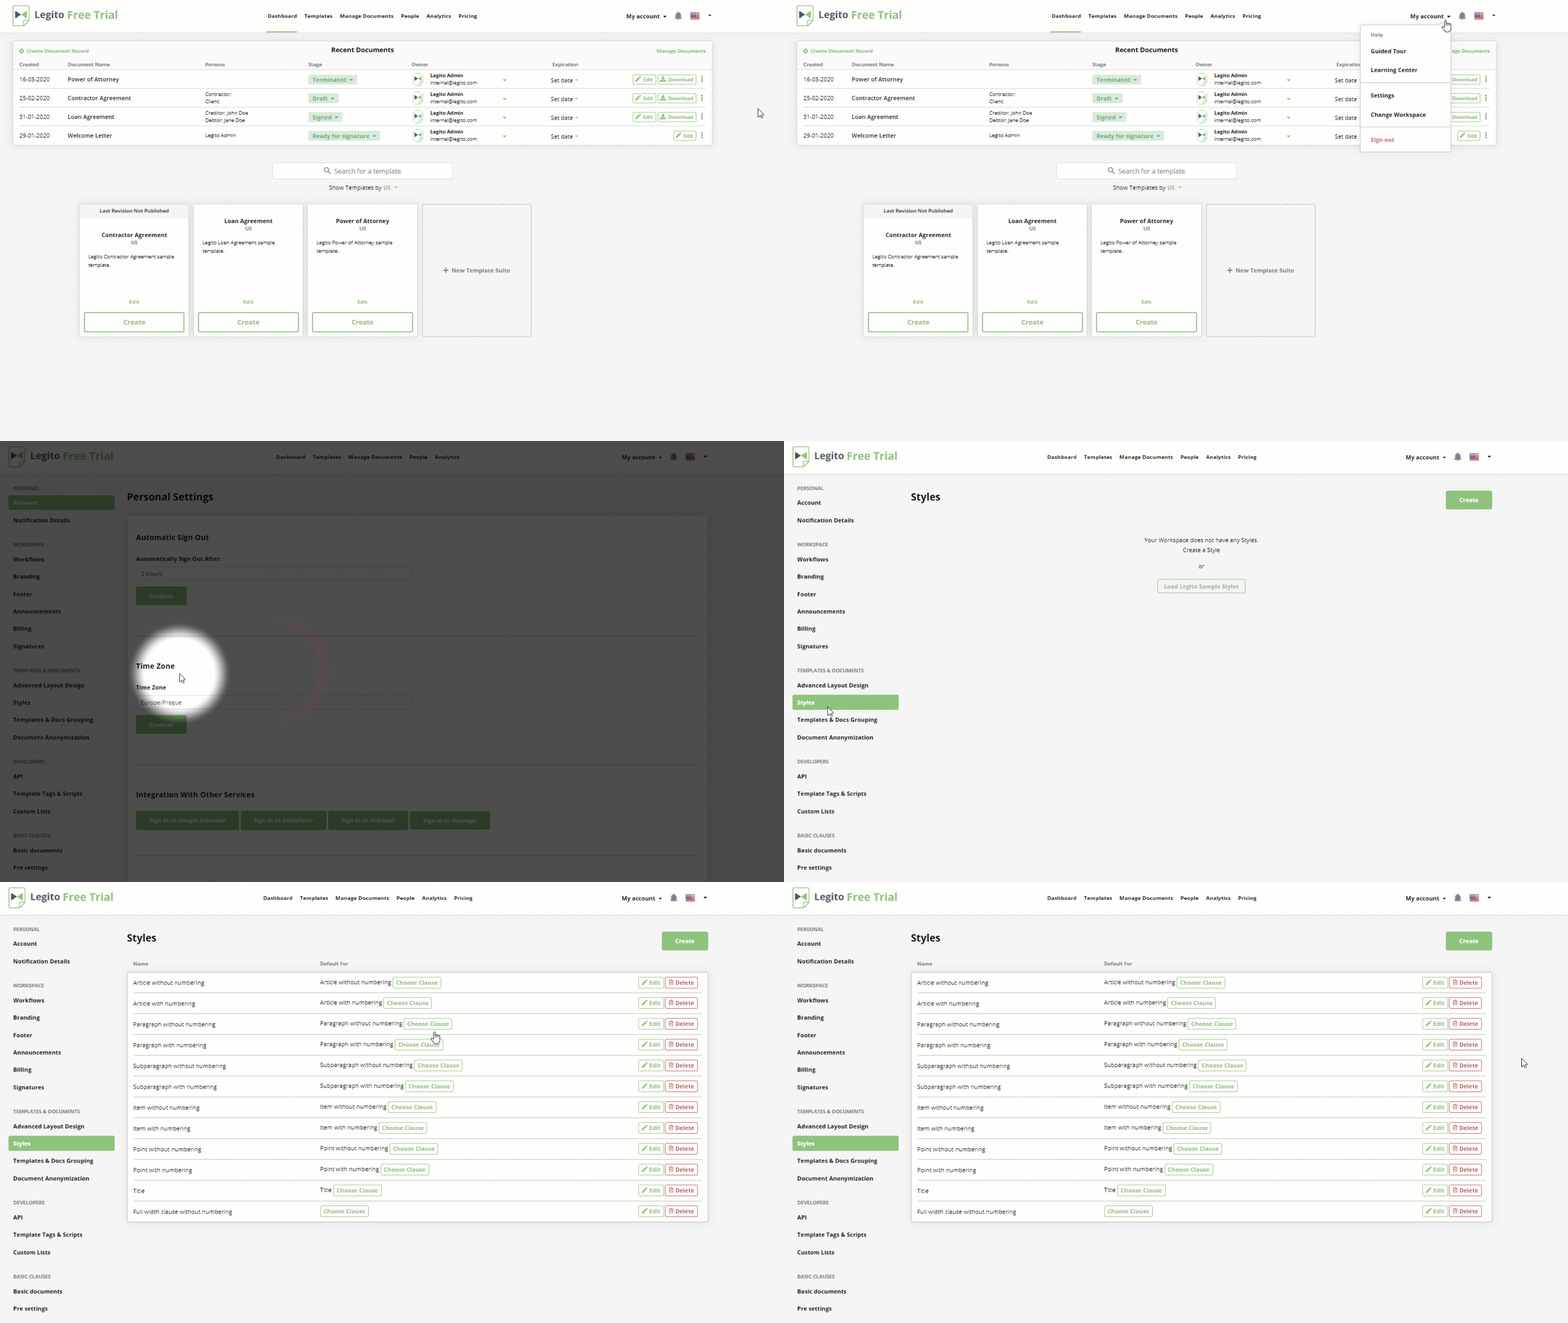
To create and edit Styles, Admins and appropriately permissioned users must go to the Styles Administration area. To get here:
-
- Find the “My Account” dropdown on the left side of the top menu.
- Choose “Settings”.
- Choose “Styles” from the left column of the following page under the Templates and Documents category.
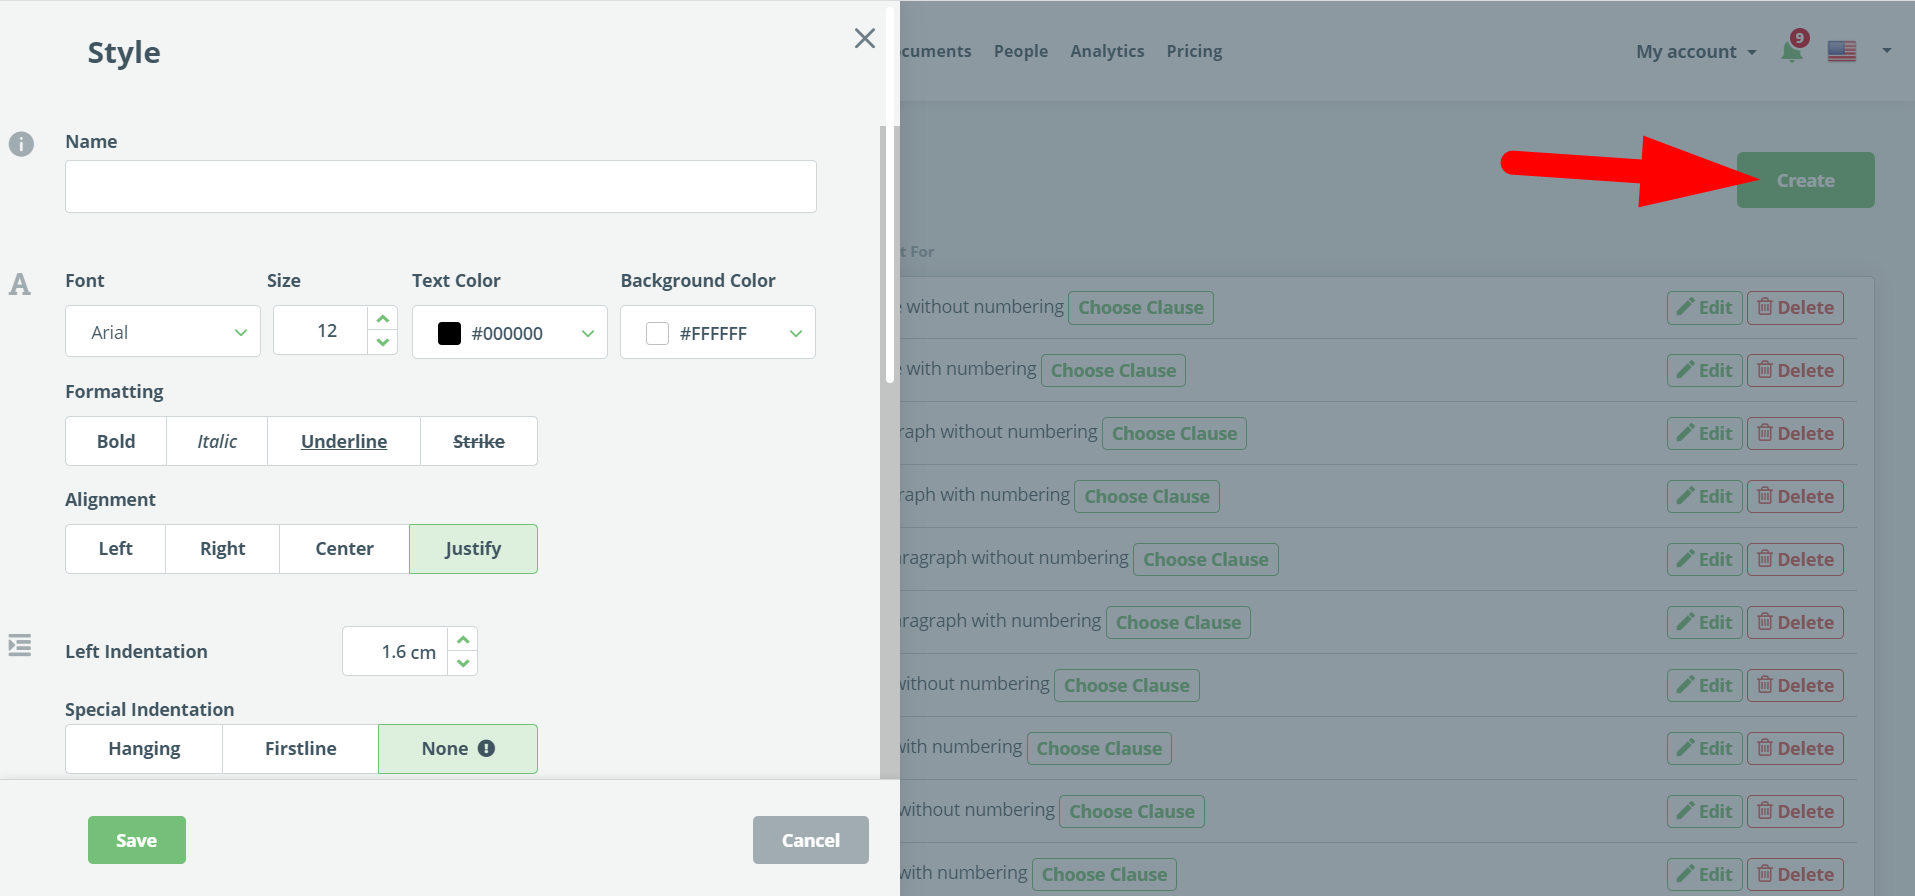
Each Workspace contains a list of sample styles that can be configured by clicking the Edit button. A new Style is created by clicking the Create button in the right upper corner of your screen.
Existing or newly created Styles may be deleted from this space.
When editing the Style, a pop-up window will appear with the following options:
Name
(create a name under which to save the Style)
Font
- Font (Type)
Sets the default font type for a Clause using the applied Style.
- Size
Sets the default font size for a Clause using the applied Style.
- Text Color
Sets the default font color for any Element inserted into a Clause using the applied Style.
- Background Color
Sets the default font background color for a Clause using the applied Style.
- Formatting: Bold / Italic / Underline / Strikethrough
Sets the default font formatting for any Element inserted into a Clause using the applied Style.
Alignment
- Left / Right / Center / Justify
Sets the default alignment for a Clause using the applied Style.
Indentation
- Left / Right
- Special
- Hanging / Firstline / None
It is best to only use the “none” setting for clauses without numbering.
Line Spacing
- Line Single / 1.5. / Double (Between Lines)
- Spacing Before / Spacing After (Between Paragraphs)
Default before and after spacing of a Clause with the Style.
Pagination
- Keep with next (no break between two paragraphs)
- Keep Lines together (all lines in a paragraph appear on the same page)
- Suppress line numbers (prevent numbering of lines)
- Widow / Orphan control (prevent a single line of a paragraph from appearing on a different page)
Pagination options take effect only after a document has exported to Word or PDF.
Formatting Exceptions
- Do not Hyphenate
Formatting exceptions take effect only after a document has been exported to Word or PDF.
Exporting to Word and PDF
- Export Style to Microsoft Word
When activated, the Style will be applied to Word or PDF documents exported from Legito. We recommend keeping this feature activated if not using the Advanced Layout Design add-on.
- Default Style from Advanced Layout Design
If the above, “Export Style to Microsoft Word” is not activated, and the Advanced Layout Design add-on is in use, a Clause’s default Advanced Layout Design may be automatically inserted by choosing the Style. Any Advanced Style inserted into an existing Style must have a name that matches the name of a Word style in your Advanced Layout Design (.docx) file.
With the exception of Pagination, Formatting Exceptions, Indentation, and Line Spacing, any Styles parameters (including inserted Advanced Layout Design) configured here can be adjusted directly and on an individual basis in Legito Template Editor. Adjustments made in Template Editor will override a programmed Style only for that Clause or Element instance.
Choosing Styles and other formatting options in Template Editor
Style configuration options for Clauses and Elements are available in Template Editor, under the Design menu item. Once clicked on, the top row will list Styles options. The options are different for Clauses and Elements.
The Styles options available for Clauses are:
- Style
- Font Type
- Font Size
- Font Background Color
- Spacing Before
- Spacing After
- Alignment
- Advanced Layout Design (if at least one Advanced Layout Design is uploaded to your Workspace)
The selected Style will automatically set off the remaining above-mentioned parameters based on default values pre-configured for the Style, which are not possible to edit.
The Styles options available for Elements (except Image) are:
- Font Formatting (i.e., bold, italics, underline, strikethrough)
- Text Color
- Highlight Color
Any Style selected for a Clause in which the Element is placed will automatically set the above-mentioned parameters based in default values configured for the Style. It is possible to adjust these selected styles individually for each Element.
Default Styles
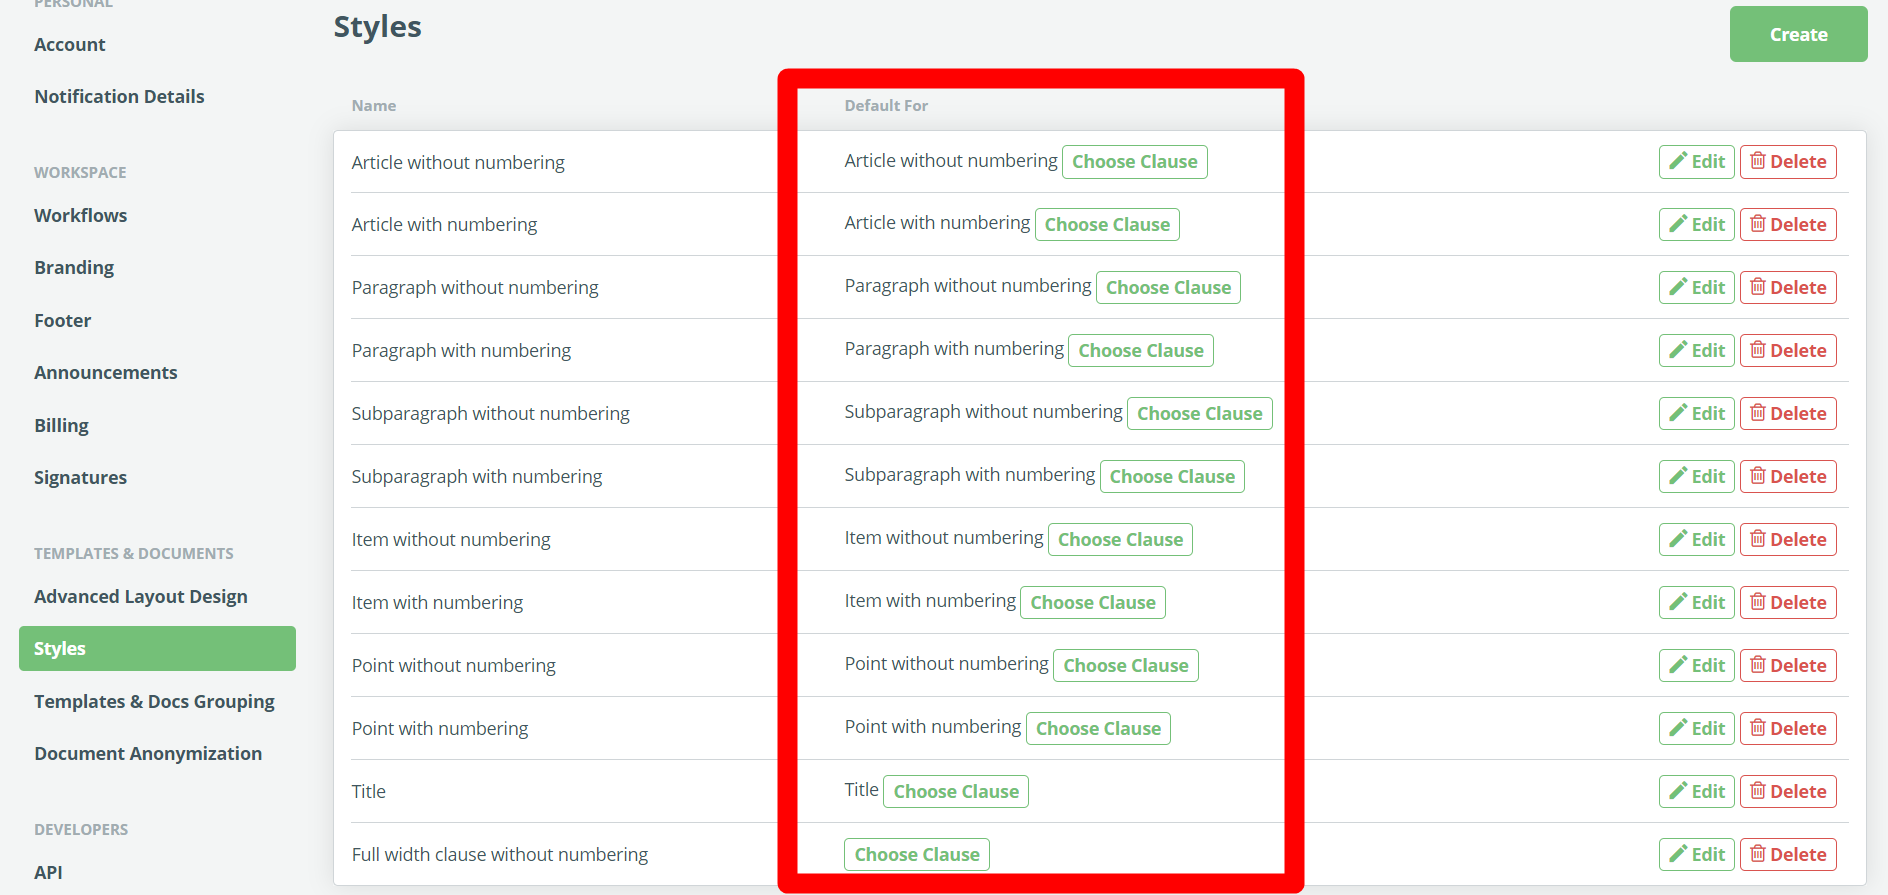
To reduce tedious work and create automated Templates more quickly, it’s possible to choose a default Style for each Clause level and split the default Styles for both numbered and unnumbered Clauses levels:
- Articles (with /without numbering)
- Paragraphs (with /without numbering)
- Subparagraphs (with /without numbering)
- Items (with /without numbering)
- Points (with /without numbering)
- Titles
The same Style may be set as the default for multiple Clause levels.


